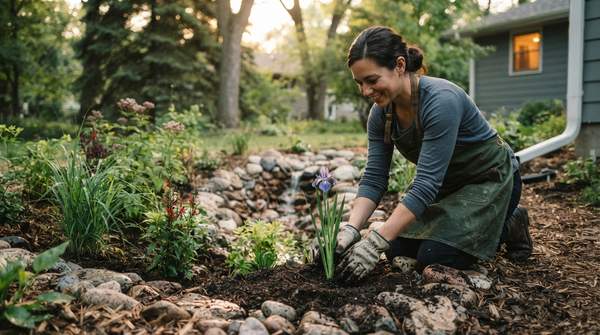
A rain garden is a shallow, planted depression that captures stormwater from your roof, driveway, or patio and lets it soak into the ground instead of running off. University extension guides describe it as an aesthetic and functional feature that a homeowner can install with minimal training and relatively little expense. The keys to success are threefold: pick a safe location, size the garden to the runoff it must handle, and build a basin with a berm and a clear overflow route. Here is how to do all three.
Phase 1: Site Assessment and Selection
Start by watching where water goes during a rainstorm. Rain gardens are placed to capture runoff from a house roof, driveway, large patio, or other impervious surface, and depending on your gutter layout or lot size, you may need more than one garden to collect everything, according to the University of Nebraska's homeowner design guide.
Distance from your house is the first safety rule. The Groundwater Foundation recommends placing a rain garden at least 10 feet away from building foundations, and a University of Wisconsin extension manual hosted by the District of Columbia's environment department shows the same 10-foot buffer in its siting diagram. That manual also flags a slope limit: keep the garden on ground with less than a 12 percent grade, since steeper slopes invite erosion and make the basin hard to hold.
Two more checks complete the assessment. Avoid spots where water already ponds for an extended period, because that signals drainage problems the garden cannot fix. And before any digging, call 811 — the free national one-call service that connects residents with their local utility-locating center to prevent damage to buried lines, as the University of California's Agriculture and Natural Resources program explains.
Placement can also serve your landscape. Nebraska's guide notes that gardens located at the edge of a lawn rather than in the middle of a turf space more effectively enhance landscape structure and space definition. A naturally low spot that already receives runoff is ideal.
Phase 2: Design and Sizing Your Rain Garden
Sizing starts with a simple ratio. The Groundwater Foundation advises that a rain garden should have an area about 20 percent of the roof, patio, or pavement area draining into it; the Wisconsin-based extension manual uses sizing tables toward a goal of controlling 100 percent of runoff in an average rainfall year while keeping the garden a reasonable size. Treat the percentage as a guideline rather than a rule — the manual itself stresses that its guidelines "are not rules," and actual sizing can shift with soil infiltration and local rainfall. A typical residential rain garden lands between 100 and 400 square feet.
Shape matters less than orientation. The Groundwater Foundation suggests shaping the garden longer than it is wide and positioning it perpendicular to the slope to catch the maximum rainfall. Popular shapes include the crescent, kidney, and teardrop, and sketching your yard's slope on paper before committing helps you evaluate how water will be redirected, according to the UC guidance.
Next, test your soil where the garden will actually sit — soils vary dramatically, even within one yard, and clay-heavy subsoil exposed during home construction drains poorly. Nebraska's guide offers a simple test: dig a hole 6 inches deep, fill it with water, and check whether it drains away in less than 24 hours. If it does, the soil is suitable. If it doesn't, you have options short of abandoning the project. The San Antonio River Authority notes that you may be able to remove some existing soil and mix sand into what remains to improve drainage, or in some locations install an underdrain pipe at the bottom to carry excess water out after it filters through the soil. These fixes work for specific conditions and may not be necessary for every garden.
Phase 3: Construction - Digging and Shaping the Basin
With the site chosen and sized, mark the outline with string or spray paint before you dig, as the Town of McCandless, Pennsylvania's municipal guide recommends. Dig the bed to a depth of 4 to 6 inches with a slight depression in the center, per that guide; Earthwatch's construction overview gives a wider 6-to-12-inch range for the basin, so match your depth to your soil and the slope of your foundation, which the UC article notes should help determine garden depth.
The berm is what turns the depression into a holding basin. Use the soil you excavate to build a berm around the garden's perimeter — McCandless's guide places it along one side, and specifies that on a slight slope the berm goes on the downhill edge so it can retain water during a storm. An Associated Press feature carried by the Santa Cruz Sentinel describes the same approach: either grade the soil gradually toward the center so it sits 6 inches below the perimeter, or dig everything but the perimeter to leave a berm of that height around the sunken bed. Cover the berm with mulch or grass to prevent erosion.
Water needs a way in and a way out. Direct runoff to the bed with a gutter extension, a downhill slope, a trench, or a buried PVC pipe run from a distant downspout — Nebraska's guide notes a buried pipe can transport water from a downspout when a swale isn't desirable. Line the trench or slope with rocks or small stones to slow the flow, and Earthwatch recommends adding rocks or riprap at the garden's entrance so water doesn't rush in too fast. Equally important is a clear overflow location where excess water can exit during heavy storms.
Finish with soil and plants. For very well-drained soils, McCandless's guide suggests adding compost to the top layer to help plants establish and retain more water. Choose plants suited to your region and to the garden's moisture zones — the center and entrance stay wettest, the berm driest. Nebraska publishes a separate plant-selection guide for its region, and Earthwatch emphasizes choosing soil and plants carefully so the garden functions properly.
Your Rain Garden Project Checklist
Use this phase-by-phase plan to work through the project in order. Each row pairs a task with the key decision or guideline behind it, so nothing critical — like the utility check, the drainage test, or the overflow route — gets missed.
| Phase | Task | Key Consideration / Guideline |
|---|---|---|
| Site Selection | Watch runoff patterns and pick the spot | Position the garden to intercept water from a downspout, driveway, or patio; a naturally low spot at the lawn's edge works well |
| Site Selection | Check distance and slope | At least 10 feet from the foundation; slope under 12 percent; avoid areas where water already ponds |
| Site Selection | Call 811 before digging | Free service locates underground utilities and prevents damage to buried lines |
| Design and Sizing | Measure the runoff area | Calculate the roof, patio, or pavement area that will drain into the garden |
| Design and Sizing | Calculate garden size | About 20 percent of the drainage area is a common guideline; typical residential gardens run 100–400 square feet |
| Design and Sizing | Run the soil drainage test | Dig a 6-inch hole, fill with water; drainage within 24 hours means suitable soil — otherwise amend with sand or consider an underdrain |
| Design and Sizing | Choose shape and orientation | Crescent, kidney, or teardrop shapes; longer than wide, perpendicular to the slope |
| Construction | Outline and dig the basin | Mark with string or spray paint; dig 4–6 inches deep (up to 12 in some guides) with a slight center depression |
| Construction | Build and stabilize the berm | Use excavated soil; place on the downhill side of a slope; cover with mulch or grass to prevent erosion |
| Construction | Create inflow and overflow | Route water in via gutter extension, trench, or buried pipe; add rocks at the entrance to slow flow; ensure a clear exit for excess water |
| Planting | Amend soil and plant | Add compost to well-drained soils; choose region-appropriate plants for wet, moderate, and dry zones |
Ready to Build Your Rain Garden?
Homeowners can successfully build a rain garden by systematically following the outlined steps for site selection, sizing, construction, and planting. The measurable indicator of success is the successful completion of a soil drainage test and the establishment of a properly sized and constructed basin with an overflow route. If your test hole drains within 24 hours and your finished basin holds water behind a mulched berm with a defined exit path, your garden is built to function — and the next heavy rainstorm will show you exactly how well it captures the runoff that used to leave your property.
Sources
- Extensionpubs
- All About Rain Gardens – What They Are & How to Build One — Groundwater Foundation
- DOEE
- Rain Gardens: A Sustainable Solution for Stormwater Management — UC Agriculture and Natural Resources
- Sariverauthority
- How to Make Your Own Rain Garden — Townofmccandless
- How to Build a Rain Garden — Earthwatch